
How to Pack a Bug Out Bag: A Practical Guide for 2026
Weight distribution, accessibility hierarchy, and three miles of trail testing — the field-proven method for packing a bug out bag that actually works under pressure.

In This Dispatch
Every operator has seen it — someone at the trailhead with a bug out bag so top-heavy it nearly tips them over. They've got a full med kit strapped to the brain stem, a shovel Velcroed to the shoulder straps, and six pouches of ramen noodles somehow lashed to the outside of an already-overstuffed pack.
The gear is fine. The packing is the problem.
Loadout architecture — how you distribute weight inside a pack — is what separates a system that carries itself from a system that wears you out in the first mile. This guide covers the non-negotiable rules for packing a bug out bag correctly, plus how to apply those rules to a specific pack so you know exactly what goes where.
The Foundation: Weight Distribution
Before you touch a single pouch or stuff sack, internal weight distribution determines how this whole system performs. Get this wrong and no amount of compartmentalization saves you.
Heavy items go in the center and high. The goal is keeping your center of mass close to your own — slightly above or at your own center, not below it. Heavy items packed low turn a 30-pound bag into a 50-pound lever that fights you with every step. Items like water bladders, tool kits, and food reserves belong in the middle compartment of a three-pocket pack, centered horizontally against your spine.
Light items go to the edges and bottom. Clothing, sleeping bags, and rain layers belong at the very bottom or in the front-facing outer pockets. They're low-demand items — you don't reach for them until you need them — and they form a protective buffer between the hard contents and your back.
The CommandoLite 35L Tactical Backpack is built around a three-compartment architecture that enforces this principle naturally. The middle compartment has a padded divider that lets you lock heavy items in place without shifting, which is exactly what you want in a primary BOB platform.
The 20% Body Weight Rule
Most tactical instructors use a hard ceiling: your fully loaded bug out bag should not exceed 20% of your body weight. For a 180-pound operator, that's 36 pounds. For a 140-pound female soldier, that's 28 pounds. This isn't arbitrary — it's the threshold where load carriage starts degrading mobility and stamina measurably in field studies.
If your pack exceeds 20% before you're even at your first waypoint, you will move slower, fatigue faster, and make worse decisions under stress. Cut accordingly. A lighter pack isn't a weaker kit — it's a functional one.
The Accessibility Hierarchy
Once you've solved weight distribution, the second layer is access. Not everything in a BOB is equally urgent. Tier your items by how fast you'll need them and pack accordingly:
- Hip belt pockets: Knife, lighter, compass, any medication you might need without stopping. Nothing goes here that you need two hands for or that requires digging.
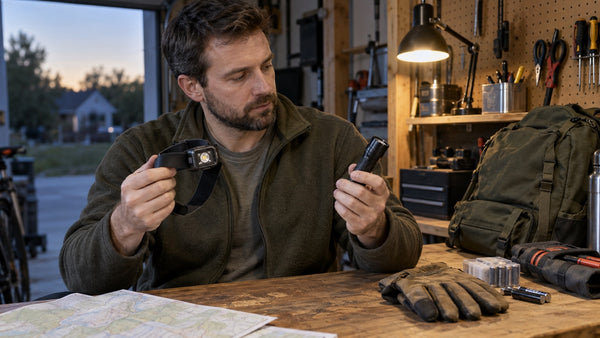
- Top dump pouch or brain: Rain jacket, gloves, map, headlamp — items you grab when weather turns or light drops. These live in the top 10% of the pack where you access them without unpacking.
- Side stretch pockets: Water bottles, fast-access snacks, phone charger. These attach externally so you don't open the main compartment to hydrate.
- Main compartment — top third: First aid kit (IFAK), communication gear, documents. Reach for these after you've stopped moving, not during a movement phase.
- Main compartment — middle: Your heaviest items — water purification, cook system, tools. Locked in place, close to your back.
- Main compartment — bottom: Sleeping bag, spare clothing layers, shelter tarp. Low priority, lowest position.
The GO Bag Tactical Sling Backpack is an excellent secondary grab bag that stores items you need fastest — attach it to the hip belt of your primary pack or keep it pre-loaded for vehicle emergencies where you need your most critical items without pulling the whole ruck.
Organized Packing: Stuff Sacks and Compression
Loose packing is how weight migrates. Every time you step, your contents shift, your center of gravity walks, and you spend energy compensating instead of moving. Solution: compartmentalize with color-coded stuff sacks labeled by category.
- Blue sack: Water and hydration — purification tablets, collapsible bottle, electrolyte packets.
- Red sack: Trauma and medical — your IFAK, tourniquet, chest seal, Israeli bandage.
- Black sack: Tools and fire — multi-tool, ferro rod, duct tape, zip ties, batteries.
- Green sack: Food and nutrition — freeze-dried meals, protein bars, water treatment.
- Tan sack: Clothing and shelter — base layers, rain shell, puffy jacket, beanie.
Pack each sack fully, then use the compression strap on your main compartment to squeeze volume down. On a pack like the CommandoLite 35L, the side compression straps do double duty — they stabilize the load and force the stuff sacks tighter, eliminating the dead air that lets contents migrate.
If you're running a 72-hour kit or a longer-duration BOB, compress your food and clothing separately to create modularity. Three-day food supply goes in one labeled sack — you can drop it if you find resupply, lightening your load significantly.
Waterproofing Layers
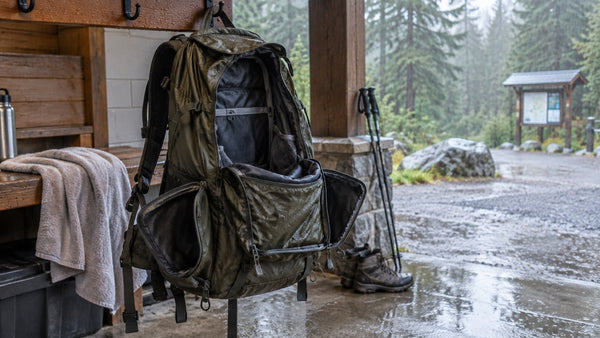
Even if your pack is water-resistant, submerging it or setting it in standing water compromises everything inside. Assume water will get in unless you've explicitly built against it.
- Critical items: Fire-starting, electronics, documents, and medications go inside waterproof zip bags or dry bags inside the pack. These are non-negotiable.
- Stuff sacks: Each category sack should be made of water-resistant material or lined. In heavy rain, the pack outer absorbs water and gains significant weight — your internal system needs to function even if the shell fails.
- Pack cover: If your pack doesn't have a built-in rain fly, carry a dedicated pack cover or a heavy-duty trash bag cut and cinched as an emergency shell. This is ounces of insurance that saves hundreds of dollars of gear.
Testing Your Pack
No BOB is field-ready until you've loaded it, shouldered it, and walked it for at least three miles on varied terrain. This isn't optional — it's where every packing theory meets physics.
Things to check on your test hike:
- Does the load shift when you change direction quickly? If yes, your heavy items aren't centered or locked in.
- Does the pack pull you backward on uphills? Your center of mass is too low or too far back.
- Does the hip belt sit on your actual hip bone, not your lower back? If it's on your lower back, the pack isn't loading your skeleton correctly — adjust shoulder strap tension.
- Can you reach your dump pouch contents without stopping? If not, you packed too deep or secured the brain too tightly.
Make your adjustments, then take the same three-mile route again. A properly loaded BOB should feel like an extension of your body, not a separate payload.
For a complete list of what belongs in each category — food, water, first aid, tools, shelter — read our Bug Out Bag Checklist, which walks through every item by priority tier. And if you're deciding between a grab-and-go setup versus a full 72-hour kit, our Get Home Bag vs Bug Out Bag guide breaks down exactly which configuration fits your threat profile.
Frequently Asked Questions
How heavy should a fully loaded bug out bag be?
Aim for 20% of your body weight or less. A 180-pound person targets 36 pounds fully loaded. Exceeding this threshold degrades mobility, stamina, and decision-making speed — the opposite of what a BOB is supposed to do.
What goes in a bug out bag first?
Start with water, shelter, and first aid — in that order. Water treatment and a rain shell/protective layer keep you alive in most emergencies. Your IFAK covers trauma. Everything else is secondary to those three priorities.
Should I use stuff sacks in my bug out bag?
Yes — color-coded stuff sacks organized by category are the single best investment in loadout architecture. They prevent weight migration, speed up access under stress, and make inventory checks fast. Label each sack clearly so you can find items without unpacking everything.
How often should I repack and test my bug out bag?
Inspect and repack your BOB every 60 to 90 days. Check food and water expiration dates, repack compressed items (sleeping bags lose loft), and confirm electronics still hold charge. Take a three-mile loaded hike at least twice a year to validate your weight distribution and comfort.
Related Gear and Guides
- Bug Out Bag Checklist: Complete 72-Hour Survival Kit Guide
- Get Home Bag vs Bug Out Bag: The Difference and What Goes in Each
- SHTF Gear List: What to Pack When Everything Hits the Fan
- Shop All Tactical Backpacks
20% off tactical backpacks and packs
Use code EDGE20 at checkout · Free U.S. shipping
Shop BackpacksWas this dispatch helpful?
Thanks for the feedback.

BattleGear™ 132-in-1 Precision Screwdriver Set - Tactical Repair Tool Kit with Magnetic Bits
132 Bits. One Tool. Zero Excuses When Your Gear Needs Fixing. When you're out in the field, at the range, or handlin...