
How to Remove a Stripped Small Screw: 6 Fixes to Try in Order
Stripped a tiny screw on a controller, glasses or gadget? Work through these six fixes in order, from the right bit and a rubber band to knowing when to stop.

In This Dispatch
A stripped screw is small trouble until it is the only thing holding the back on a game controller, a pair of glasses or a flashlight you need tonight. The good news: most tiny stripped screws come out with the right bit, steady pressure and a little patience. This guide walks through what to try, in order, before you reach for anything drastic.
How do you remove a stripped small screw?
Stop turning the moment the driver slips. Then work from the gentlest fix to the most aggressive: confirm the drive type and size, clean the recess, add grip with a rubber band, and use firm downward pressure with slow, short turns. If the head sticks up, grip it from the side. Only when those fail should you move on to an extractor or a repair shop.
Before you start: set up so the screw can't get worse
- Power down. Switch off electronics and remove batteries where you can before opening a case.
- Light and magnify. Good light shows you whether the recess is only worn at the edges or rounded out completely.
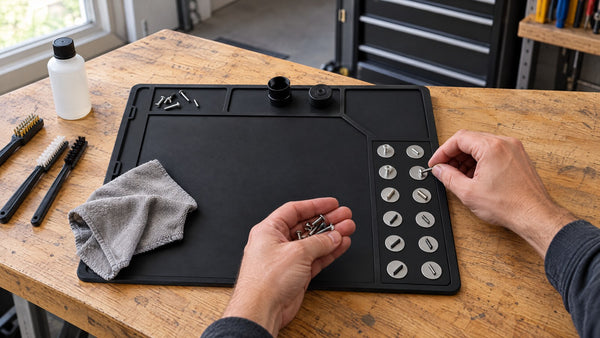
- Contain small parts. Work on a tray, mat or towel so the screw (and its neighbors) can't roll off the table. A magnetic surface helps with steel screws, which is the same idea behind our work mat setup guide.
- Brace the item. Hold the part flat and steady so all your pressure goes straight down into the screw.
Step 1: Make sure you have the right bit
Many "stripped" small screws are really the wrong bit. A Phillips bit in a JIS screw, a Torx bit one size too small, or a flathead that is narrower than the slot will cam out and chew the recess. Check the drive type, then try the size that fills the recess completely with no wobble. Our guide to precision screwdriver bit types explains how to tell Phillips from JIS, tri-point from tri-wing, and Torx from pentalobe.
If the recess is worn at the edges, a bit one size larger sometimes bites into fresh metal. Seat it gently first; do not hammer a bit into a screw on electronics or eyewear.
Step 2: Clean out the recess
Dirt, old thread locker or metal shavings can keep a bit from seating. Use a pick, a stiff brush or a puff of air to clear the head, then try the correct bit again. A clean recess gives the bit more surface to grab.
Step 3: Add grip with a rubber band
Lay a wide, flat rubber band over the screw head and press the bit through it into the recess. The rubber fills the worn gaps and adds friction. Push down firmly and turn slowly counterclockwise. If the band tears, reposition it and try again. This is the most common fix for lightly stripped Phillips and cross-head screws.
Step 4: Press harder, turn less
Most stripping happens when the driver rides up out of the screw. Hold the driver perfectly vertical, put your palm or the swivel cap on top, and push down harder than feels natural while turning in short, controlled increments. A magnetic bit holder helps here: the bit stays in the driver and the screw is less likely to drop once it frees up.
Step 5: Grip the head from the side
If the screw head stands proud of the surface, skip the recess entirely. Grip the sides of the head with small needle-nose or locking pliers and turn counterclockwise. This works well on battery doors, small hinges and gear hardware where the head is not countersunk.
Step 6: Know when to change tools
A screw extractor, a small bit designed to bite into a damaged head and turn it out in reverse, is a separate tool. It is a good option for larger household and gear screws, but it is easy to snap or overshoot on very tiny electronics screws. If a screw on a phone, laptop or other expensive device still will not move after the steps above, stop and consider the manufacturer's service or a repair shop rather than drilling.
After it's out: replace the screw and prevent the next one
Do not reuse a stripped screw. Match the thread, length and head type with a replacement, and keep it in a labeled spot until the job is done. To avoid stripping the next one:
- Identify the drive type before you turn anything.
- Use the largest bit that seats fully, and keep the driver straight.
- Press down more than you think you need, and turn slowly.
- Snug small screws, especially into plastic. Stop when they seat.
- Keep bits sorted so you are not grabbing the "close enough" size.
A kit that keeps the right bit within reach
The BattleGear 132-in-1 Precision Screwdriver Set covers the small fasteners in this guide with 132 chrome-vanadium bits, including Phillips, Torx, flathead, pentalobe, triangle, Y-type and U-type, plus a magnetic quick-change bit holder and an organizational storage case, according to its product page. It is a practical kit for game controllers, eyeglasses, laptops, EDC gear and small household fixes. Browse more everyday-carry tools in our EDC collection.
The BattleGear 132-in-1 Precision Screwdriver Set puts 132 precision bits, a magnetic quick-change holder and an organized storage case in one kit, offered in OD green, midnight black and arctic white.
See the 132-in-1 Screwdriver Set →Was this dispatch helpful?
Thanks for the feedback.

BattleGear™ 132-in-1 Precision Screwdriver Set - Tactical Repair Tool Kit with Magnetic Bits
132 Bits. One Tool. Zero Excuses When Your Gear Needs Fixing. When you're fixing electronics, eyewear, gear or somet...